

 Log In
 Register
 Home
Home

 Topic RSS

4:37 am

August 30, 2010
 Offline


Grant invited me to post this question over here, inspite of me being a Texican. Much appreciated. 🙂
I have a 3 work station 42.4 ton hydraulic forging press custom built for me. See it here:
My press is intended for all kinds of forging, but the primary job I wanted it built for was to punch eyes in hand tool heads like hammers and axes. I've been working with it a while and just do not have it where it will do quite what I need it to.
My problem is that whenever I go to punch a hole, I end up squishing the thickness of the metal down. It doesn't seem to matter whether the tool is blunt on the end or sharp. If I make it too sharp, it deforms quickly, even if made from H13.
After reading the David Hyde article Grant kindly supplied, I have two theories on solving this: 1.) Use the smaller, quicker cylinder on the press and work it a little at a time from each side. 2.) Make a setup that lets me punch from both sides simultaneously, as seen here:
I'd like to be doing this on a low-level production basis and it's been eluding me so far. I can do the rest of the tool-shaping just fine, but eyes are giving me trouble. What do y'all think?
12:43 pm
May 13, 2010
Offline
I have two different suggestions. Start with thicker metal so that you end up with the right thickness after the thinning caused by the punching. I don't know what shape you are punching with, but I was taught to punch hammer eyes with a round punch, you then flatten the side and you end up with an oval eye.
I may be wrong but I would think containing your stock on the sides would reduce the drag down, because the metal cannot swell to the sides. It can still flow to the ends but being contained some of the metal should start coming up.
4:00 pm
August 30, 2010
Offline
Good thoughts. I hadn't really considered starting round and squishing oval. On the other hand, part of what I'm wanting to do is make punched-eye axes, which needs a long eye. I wonder how much stretch I would need to go from round or partly oval to a long eye like that? Hmmmm.....
I like the idea of containing the sides. If that works, it may be the simplest solution. I'll have to give it a try.
8:15 pm

March 26, 2010
Offline
James
Could you you post a video of you punching the eyes, or some photos. It may be easier to give some advice then. The photo of the slot drift in my article gives a pretty good idea of the geometry of the tooling I use. Maybe try duplicating something similar. The tool in the article makes 30mm holes, the tip is about a 22mm by 5mm oval (from memory) and the taper transition from this to full round is about 75mm. The tip is rounded all over. A chisel edge is of no use with the pressure/heat used. It will quickly round up (unless frequently withdrawn and cooled ... v. tedious) and may spread wider than if it had been made "pre-round" (I hope this makes sense). My tools are H13 heated to a good orange and air cooled. I guess I should temper them but they've stood up without so far. I do cool it with a cup of water occasionally.
I can't work out the diameter of the cylinder you are using but it looks similar to mine. You're also using a 10HP motor so if the pump is suitably sized you should be moving the ram at a good speed. That said, hose diameter is quite critical. You're moving a lot of fluid in a short time. From memory (I'm at home not the w/s) my hose are about 3/4". Given the distance of your motor to cylinder, too small a hose could slow things significantly.
You will always get a small degree of drag down around the holes. The thinner the tip and the longer the taper the less this is when done at a good heat. In effect my tooling is a slot punch and drift in one tool. Doing it this way it has too push a lot of metal somewhere after the slot is punched, Most of this goes to the sides but some causes the metal to get thicker in the OTHER plane (ie along the tool axis). You get a strange situation where you both make the metal slightly thicker and have a small amount of drag down. That said it keeps the shape pretty well .... but that said I very very rarely punch round bar, it's nearly always square or rectangular. Even when making hammers from round stock I forge it square first.
I'm sure you've found out but starting the slot BANG IN THE MIDDLE of the bar is VERY important
5:07 am
August 30, 2010
Offline
David, I was going to get some photos of the result of the punch today, but my camera's batteries died on me. I'll see what I can do tomorrow, but I probably won't be able to get video for a bit. Trying to get through a few paying gigs and I have a student in the evening.
The small cylinder on the left side of the press was calculated to be 14.something tons, and moves fairly quickly. My chisel is also H13. Still have a fair amount of the H13, but trying to be somewhat sparing with it.
Combining several ideas from this forum and from over at Iforgeiron (which is where Grant directed me to y'all), I think this is going to be my next attempt:
1. Use the quicker cylinder.
2. Use a somewhat thicker and more tapered punch.
3. Use a bottom jig with bars that will keep the sideways spread limited.
4. Use either a pointed tip on the chisel (like seen in this thread numerous times: http://www.iforgeiron.com/topi.....-geometry/) OR a pre-rounded point.
Umm, I think that was all. 🙂 I may not do all of those at the same time on the next try, but they are certainly all things I intend to try. I have some scrap 4140 that I'll probably use and save my H13 until I have this thing sorted out.
Oh yeah, center of bar is the way to go!
11:53 am
March 26, 2010
Offline
James my gut reaction is that the small x section of the tip combined with a good taper is at the heart of good punch/drifting. I kinda think the chisel edge will quickly blunt under power. It works a treat by hand though where the tool is often and rapidly withdrawn and cooled
4:24 pm
August 30, 2010
Offline
Haven't gotten to play with this any yet (been working on paying gigs), but here are pictures of what I had before:
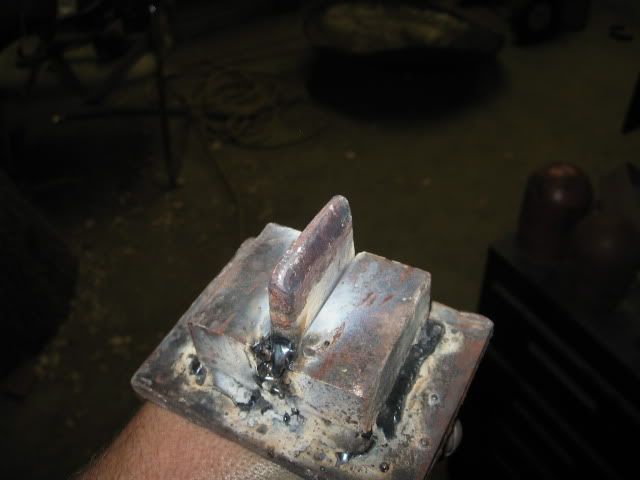
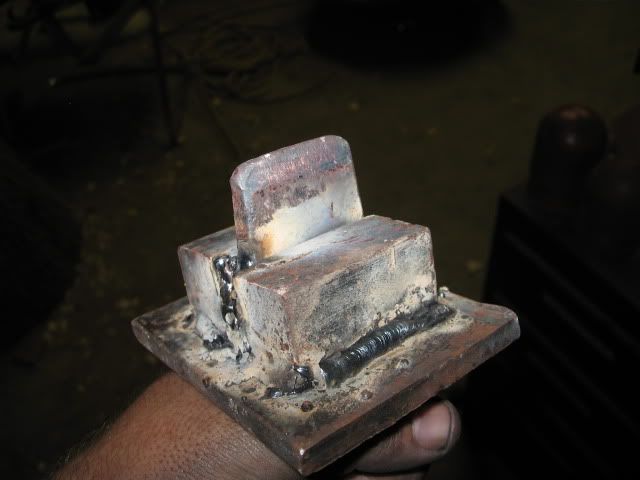
First, the punch itself. Please ignore the bad welding. The bit is H13, and it was ground to a fairly sharp angle. You can see how badly it deformed. I didn't take a measurement, but it's long enough to make a small camp ax eye.

The steel being punched: 1" square mild steel. See how much it squished down?
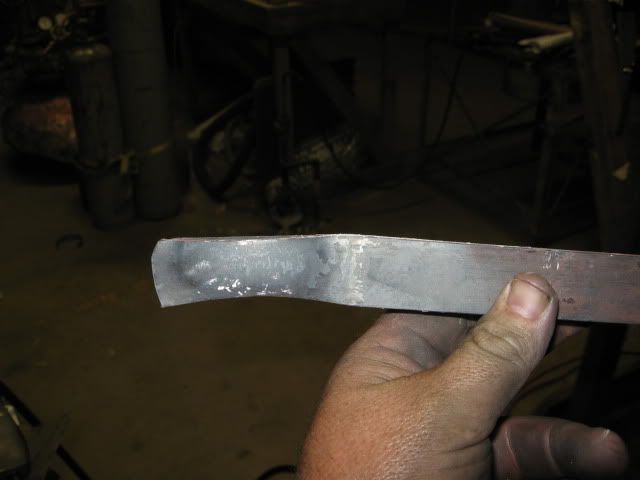
The hole once it was finally punched. Pretty ragged. I punched back and forth, pushing the biscuit around without it coming loose until I finally took a pointed bar and pryed it out.

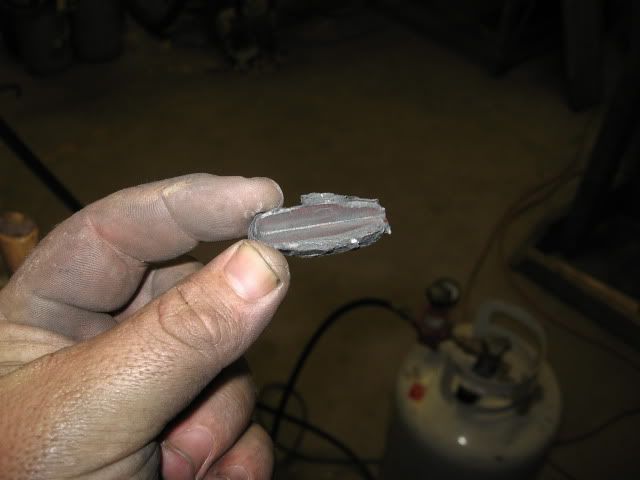
And finally, the biscuit I finally removed.
So, in retrospect, having a sharp edge on the punch wasn't too bright. If anything, it should have been cold chisel-ish.
I'll let y'all know the results of further experimentation.
6:10 pm
March 26, 2010
Offline
Not enough taper there James. I haven't done any comparative experiments to prove it but to quote Terry Clerk, I know a good woman when I see one and I know a good car when I see one and I know that punch hasn't got enough taper.
Photo shows a selection of the punches I use. Note the taper on them all. Punch in my hand makes a 30 x 12mm rectangular hole, tip is 25x 5 mm, taper is over about 70mm
Notice they all have domed tips, not chisel points, almost the shape you'd get if you went over a chisel point with a flap wheel
5:43 am
August 30, 2010
Offline
Y'know, David, that makes sense in a way. Without the taper, all the force is downward, which squishes the metal. Maybe with a thicker wedge, some of the downward force becomes sideways force and keeps it from distorting so much. Worth a try, certainly.
Most Users Ever Online: 668
Currently Online:
15 Guest(s)
Currently Browsing this Page:
1 Guest(s)
Top Posters:
Larry L: 1566
Grant: 1420
Bruce Macmillan: 625
Lee Cordochorea: 595
Lynn Gledhill: 572
JNewman: 520
Gene C: 504
J Wilson: 426
Eric Sprado: 383
Tom Allyn: 340
Member Stats:
Guest Posters: 22
Members: 8729
Moderators: 4
Admins: 1
Forum Stats:
Groups: 23
Forums: 97
Topics: 3538
Posts: 20289
Newest Members:
TruSteele13, windhaen, Jeffrey Funk, Tom, churndashmaven, cameliacity, fred.f.chopin, RuoYi, rodeoneerer, NWBABjornModerators: Steve McGrew: 77, N.W.B.A.: 72, webmaster: 0, bluehost: 0
Administrators: admin: 540
 Usage Policy